New & Improved
Upgraded Practice Table With Shooting Station
Looking for Dice Layouts, Chip Rail and Corners for your table find them here.
Before you start your pactice table, maybe refresh your knowlege of the game with Free Craps Lessons?
Practice Table Construction (updated 05/30/02)
Materials: (total cost about $200)
| Birch Plywood | home supply store | 1 | 3/4″ | 4′ | 8′ |
| Birch Plywood | home supply store | 1 | 1/2″ | 3′ | 5′ |
| Plexiglass | home supply store | 1 | 1/8″ | 2″ | 48″ |
| Flat Head Wood Screws | home supply store | 20 | #10 | 1 3/4″ | |
| Round Head Wood Screws | home supply store | 2 | #6 | 1″ | |
| Wood Glue | home supply store | 1 | 8 oz. | ||
| Household Adhesive (for rubber) | home supply store | 1 | 4 oz. | ||
| 75% wool 25% nylon billiard felt or craps Layout | www.bestbilliard.com or http://www.casino4you.com/ | 1.5 Yards | |||
| Flannel | http://www.casino4you.com/ | 1 Yard | |||
| Diamond dice rubber | http://www.casino4you.com/ | 1 | 9 1/2″ | 48″ | |
| Banquet table legs | www.woodworker.com # 802-086 | 1 Pair | |||
| Waxed paper |
Tools:
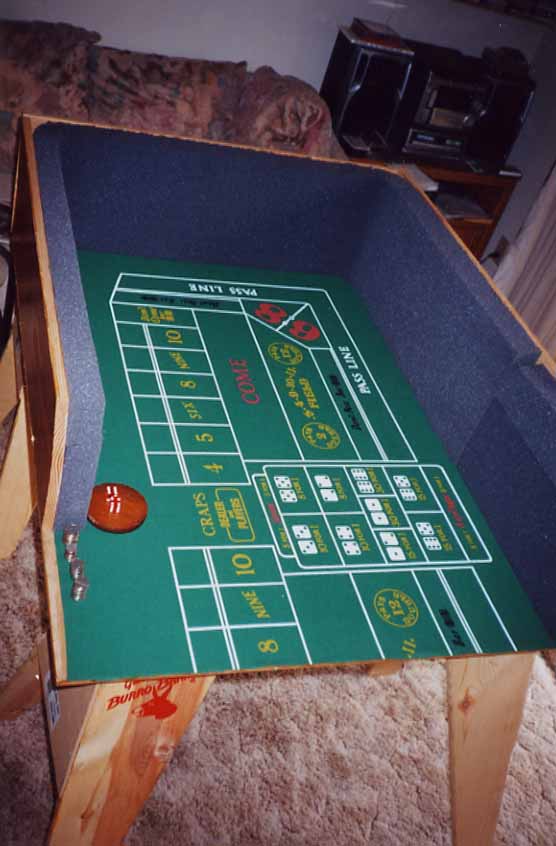
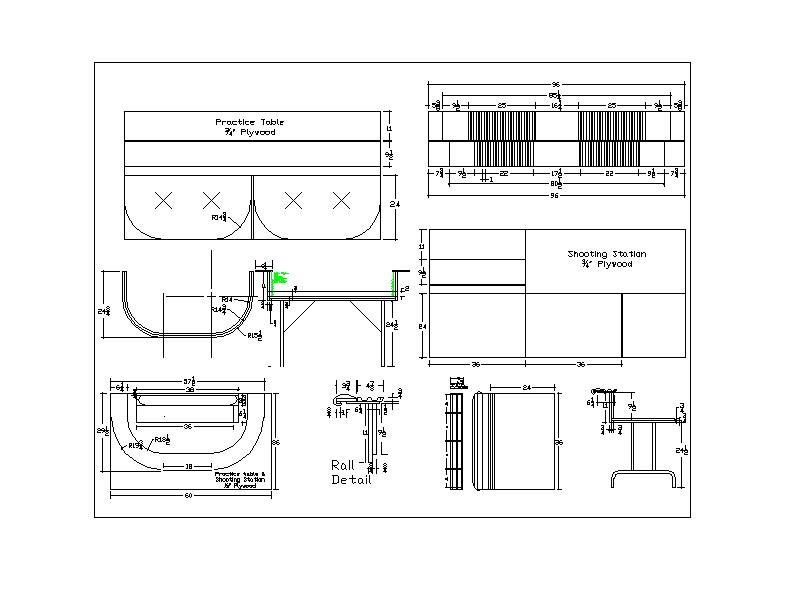
The sides and bottom base of the practice table are made from one sheet of 4’x8′ 1/2″ plywood. It can be any type of any plywood, but birch or oak will make a better looking table and will dice will not dent as easily. The top rail of 1/2″ plywood adds strength and helps maintain shape and it can be upholstered if desired. It is important to make the table solid. Making the bottom base a single layer reduces cost but compromises authenticity.
By purchasing the plywood at a Home Depot or Lowe’s they will make some of the cuts for you. Two cuts are free. Have the sheet split lengthwise with one side 24″ wide. Split the 24″ wide strip in two pieces giving 2 – 24″x47 15/16″ pieces (you lose 1/8″ for saw blade). Depending on size requirements the bottom base could be trimmed to 47 1/2″ as shown in the drawing or left at 47 15/16″ width. The other piece would be ripped lengthwise twice to make a 9 1/2″ x 96″ piece and an 11″ x 96″ piece.
Bottom Base
Attach the two 24″x47� ” pieces together using six to eight 1�” #10 flathead wood screws from the bottom side only. Be sure that the screw heads are flush. Layout the 14�” radius corners and cut with a hand held jig (saber) saw. A router can be used to smooth the edges with a 3/8″ round over bit top and bottom. The routing is not essential but it makes the felting easier. Do not cover base with felt until the sides are constructed. When covering with felt an under layer of flannel (purchased from a fabric store) reduces the hardness and makes the surface more like casino conditions.
The banquet table legs are 28″ in length. Cut 3″ to 3�” off the bottom using a tubing cutter of hack saw. Mount the legs, with the screws provided, to the base about 6″ in from the edge. Make sure that the smooth surface (no screw heads) of the base is up.
Side Boards
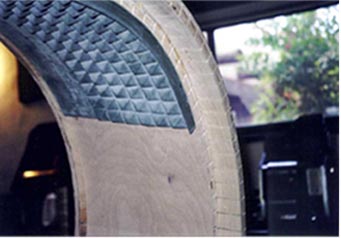
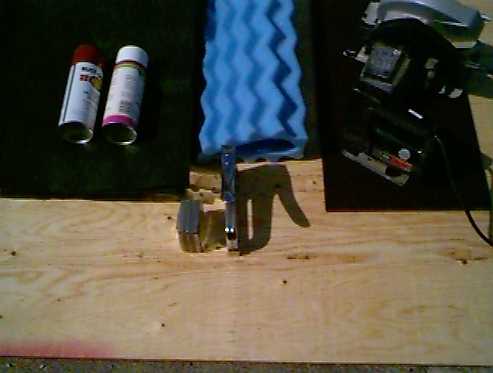
Cutting of the kerfs, which allow the side board to bend around the corner, is accomplished by setting the saw to a depth of 1/16″ less than the thickness of the plywood. Try a couple of test cuts on some scrap or the ends to make sure the cut does not go completely through the plywood . If the depth becomes equal or greater than the thickness of the plywood it will ruin the project. Layout the kerf lines 1″ apart (�” or 3/4″ makes a smoother turn but is a lot more work). Use a straight edge guide to cut the kerfs with a hand circular saw or a radial arm saw. The radial arm saw, if you have one, makes the job much easier. Make sure that there is a rigid board under the entire length of the side board when cutting as the side board will break at the kerfs if there is no support. The ends should not be cut to length until the board is wrapped on the bottom base and marked and cut.
There are two side boards. The outside side plywood is wrapped around the bottom base with the kerfs facing inward towards the bottom base and with the edge of the outside side flush with the underside of the base. Placing waxed paper around the edge and on top of the base will keep glue in its place. Wetting the smooth surface of the plywood with a spray bottle, where the kerfs have been cut, helps bending. Clamps or temporary nails hold the outside side plywood in place against the base. Do not drive nails all the way in as they will be removed when the inside side board is glued into position.
Apply wood glue to inside surface (kerf side)of the outer side. Carefully bend the inside plywood side (kerf of inside plywood facing the kerf of the outside plywood) into position. Clamp or screw using 1�” #10 screws, the inside plywood to the outside plywood (from the inside). Allow adequate time to dry.
The excess sides may now be trimmed with a saw even with the bottom base.
An optional 2″ high plexiglass fence added to the front of the table will keep the dice confined to the practice table. I have found it keeps the dice from bouncing off the table when your friends toss the dice. A precision shooter would never make a shot with that much rebound. The plexiglass starts just above the base. Drill holes in plexiglass and attach with 2 1″ #6 round head screws.
Top Rail
Cut out the top rail from the �” plywood using a jigsaw. Align on top of the sides and attach using 1�” #10 screws. You can upholster the top rail with 1″ foam and vinyl if desired.
Chip rails can be purchased at http://www.casino4you.com/
Felt
Place the flannel on the base (make sure screw heads are on the underside) and staple. Apply the felt over the flannel and attach using a stapler. Start with the straight edge and stretch and staple.
Diamond Rubber
Attach the rubber centered between the curved portions. Use a rubber adhesive as it is a silicone flexible adhesive that will not become brittle.
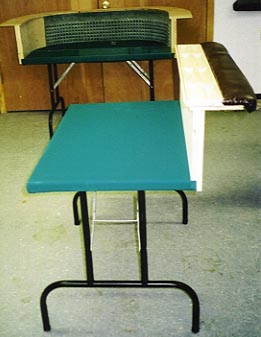
Shooting Station for Practice Table Construction
| Birch Plywood | home supply store | 1 | 3/4″ | 4′ | 8′ |
| Birch Plywood | use extra from practice table | 1 | 1/2″ | 4′ | 8′ |
| Flat Head Wood Screws | home supply store | 20 | #10 | 1 1/4″ | |
| Flat Head Wood Screws | home supply store | 5 | #10 | 2″ | |
| 75% wool 25% nylon billard felt | use extra from practice table | 1.5 Yards | |||
| Foam For Padding | Fabric Store | 1 | 1″ | 8″ | 36″ |
| Vinyl Upholstery Fabric | Fabric Store | 1 | 12″ | 48″ | |
| Banquet table legs | www.woodworker.com # 802-086 | 1 Pair |
Tools:
Handheld Circular Saw
Handheld Jig Saw
Drill
Router (optional)
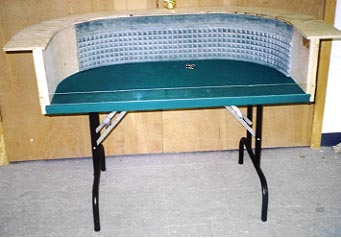
The sides and bottom base of the shooting stand table are made from one sheet of 4’x8′ 3/4″ plywood. The top rail of �” plywood is for the rail padding we lean against so much. Optional chip trays are shown but not described. Email me for details on the chip tray if you want to go to this detail.
By purchasing the plywood at a Home Depot or Lowe’s they will make some of the cuts for you. Two cuts are free. The cutting diagram will help.
Station Bottom Base
Attach the two 24″x36″ pieces together using 1�” #10 flathead wood screws from the bottom side only. Be sure that the screw heads are flush to avoid marring any surface you set the table up on. A router can be used to do a 3/8″ round over on the top and bottom. Cut 3″ to 3�” from each leg of the banquet table legs using a tubing cutter (a hacksaw will work but is a lot more work and the result is not as smooth).
Next attach the banquet table legs. Place them about 6″ from the ends of the base and attach with screws provided with the legs.
The base must be covered with felt prior to installing the side. Stretch and staple to the station base.
Side Boards
Sandwich the �” x 36″ (9� “ and 11″ high) side boards and use 1�” #10 flathead wood screws from the 9�” side to secure the two pieces. Be sure that the screw heads are flush.
Place the sandwiched plywood side board on the felted base and attach with 3 2″ #10 wood screws.
Attach the �” plywood, 6�” wide top cap to the side boards using 1�” #10 wood screws. You may add chip rails if you desire. Chip rails are made out of 1″ thick mahogany. It takes some woodworking skill to make the chip rails.
The �” x �” x 38″ piece must be glued to the �” x 3�” x 38″ plywood before the corners are rounded. After this step apply 1″ foam over the top and front of the plywood. Staple the vinyl upholstery fabric to the rail for a casino-like rail rest.
Quick and Dirty Practice Table
Supplies:
| 1 | 4’ x 5’ Sheet of 1/2 inch plywood or particle board |
| 1 | 2’ x 3’ Sheet of masonite |
| 1 | 72” x 48” sheet of felt |
| 1 | Twin size foam mattress pad (twin size) |
| 1 | Can of spray paint |
| 1 | Can of spray adhesive |
| Circular saw | |
| Drill | |
| Hammer | |
| Staple Gun |
Time:
Approximately 2 hours. If you spray paint the mattress pad, perhaps do this step the evening before.
Cost:
If you don’t have to buy power tools, this will cost around $29.
Construction:
- Cut foam mattress pad into a 12” x 6 ‘ length. Spray paint to desired color (optional)
- Cut plywood to be 4 feet wide by 3 feet deep for base.
- With leftover plywood, cut another piece of plywood 4’ long by 12.5” high for the back wall.
- Cut 2 masonite sheets 15” long by 12.5” high for side walls
- Drape felt over plywood. Cut to a size such that there is about 2” extra around the perimeter of the plywood. Staple felt to the edges of the plywood, keeping it taught.
- Screw the back wall to the base
- Screw side wall masonite pieces to the base. Make sure that they overlap with the back wall plywood. Screw masonite side pieces to the back wall as well.
- Place mattress pad on the table, inside the 3 walls. You will be able to make curved corners. Once you have the fit that you like, spray adhesive on the inside of the back and side wall pieces AND on the back of the mattress pad. Secure into place. Let dry.
Options: You can purchase REAL craps table felt with all the markings and REAL back wall pyramid rubber from http://www.gamblersgeneralstore.com. It will significantly increase the cost of building the table.
(under construction)
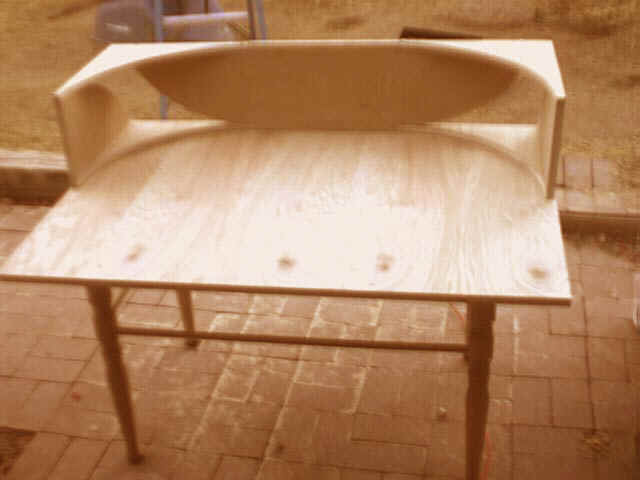
(finished practice table)
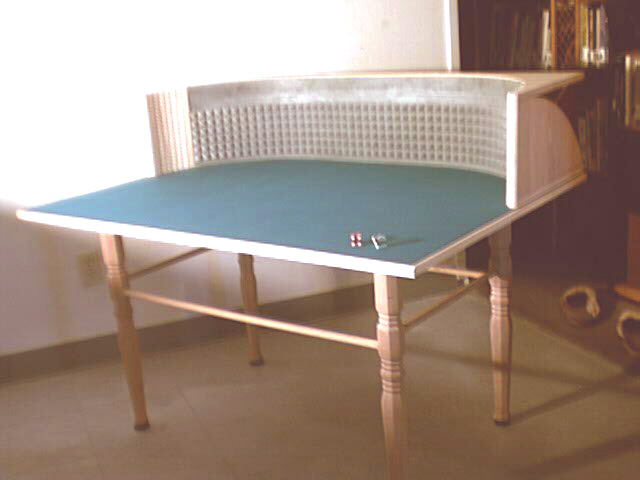
Here is a picture of the practice table Big Lou constructed!